A Step-By-Step Guide To Creating Your First Embedded Form.
By the end of this short guide, you will know everything you need to know to get your first embedded form up and running on your website, all set to collect quality leads. We will be covering:
Introduction To Embedded Forms
Creating a New Form from Scratch
Editing the Content of the Form
Setting up the form to display on your website
Introduction To Embedded Forms
An embedded form is basically a way in which a user can embed a form that they created in SendX into a page on his website. Viewers will see the form on your page instead of having to click on a link to visit your form. This is a great way to collect leads without making the viewer leave your main web page.
Creating A New Form From Scratch
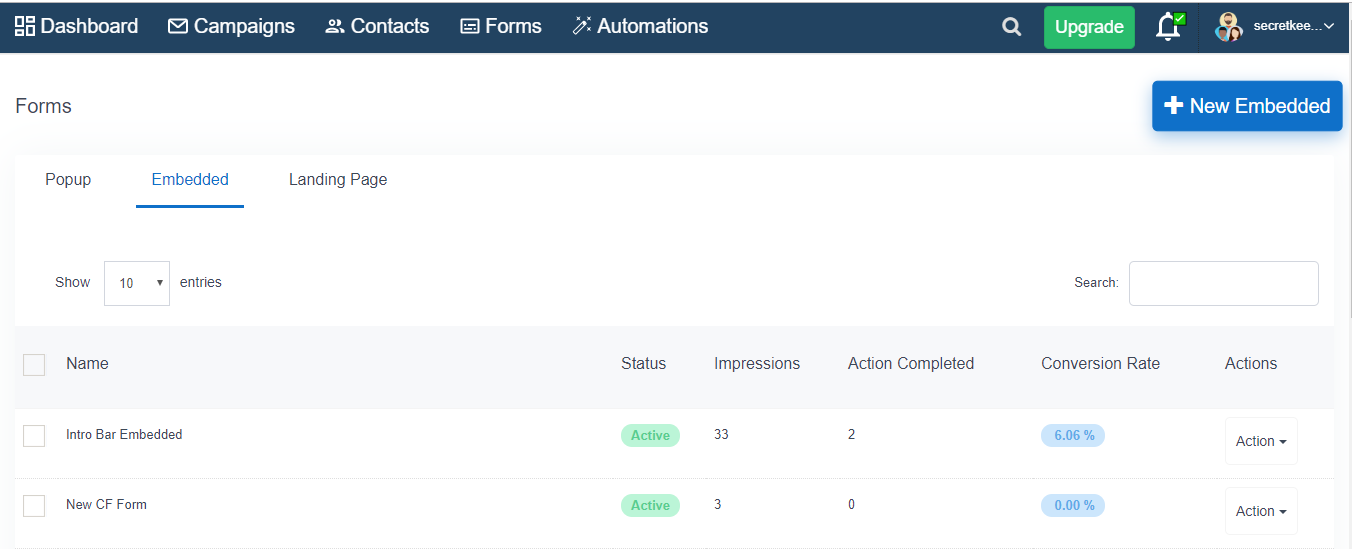
First, go to Forms on the dashboard. Then go to Forms + Embedded + New Embedded to create a new embedded form.

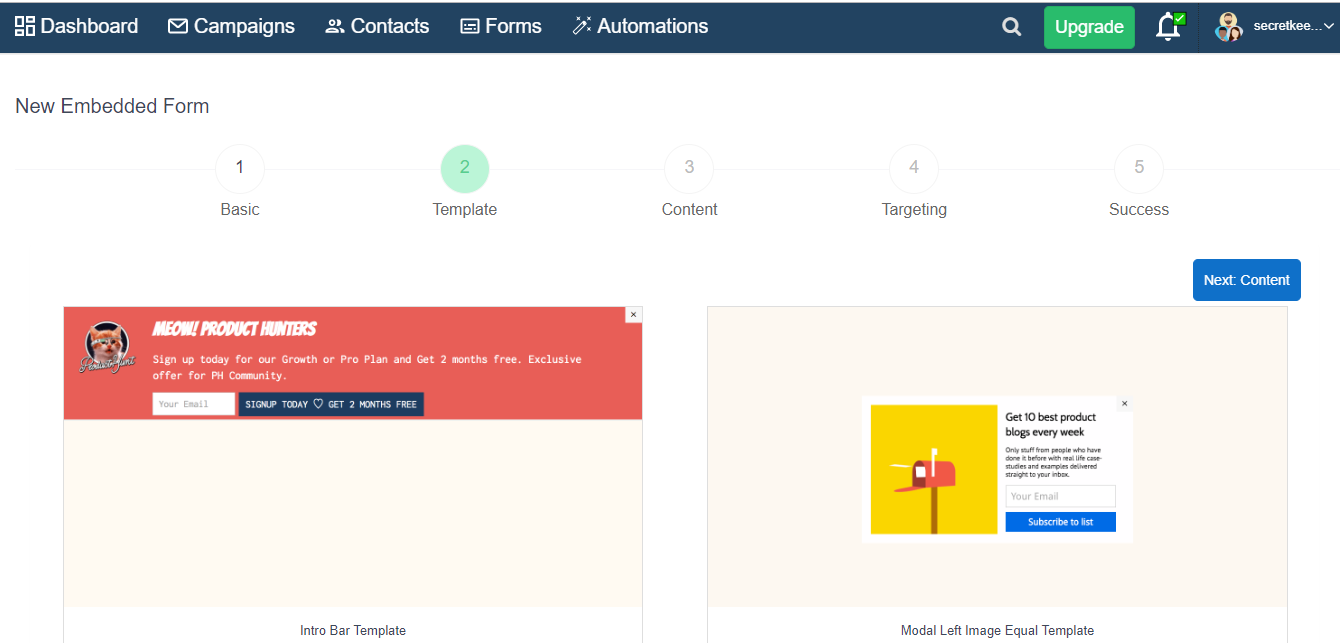
In this guide, we’ll create an embedded form named “Newsletter Subscribe Form.” Then select a template and click Next to go to the Content tab.

Editing the content of the form
What you write on the embedded form is hugely important to evoke some response out of your viewer. You can edit what you show, and create a suitable message for your reader under the Content tab. You can also change the colors according to your preference, to make your form more attractive. You can do it by clicking the icon under Title or Description, etc. Add a title and Description to present your offer. Use the Button Text field, to add a specific Call To Action message for the user. Check the Add Image box, if you want to add an image to your form.

Next, go to Target, where you’ll get options for who should see or not see your embedded form.
Then click the Success button, where you’ll find more options to customize your embedded form.
Click Submit to create the Form. You will be taken to a page which would look something like this, confirming that the Form has been created successfully:
You’ll get a unique embed code below. Copy and paste it wherever you want the form to appear on your website or blog.
Congratulations! You now have your first Form Embedded into your website, all set to collect leads.
