A Step-By-Step Guide To Creating Your First Automation In SendX.
This guide explains automations in SendX and the options available.
Introduction to Automation
Understanding Triggers
Understanding Actions
Setting Up an Automation
Introduction to Automation
Automations are simple “if this, then that” rules that you define to put parts of your marketing on autopilot. For example:
If a contact clicks a Product A link in an email, associate the tag Product A Interested to that contact.
If a contact has subscribed to Trial users list then initiate Onboarding drip sequence for him.
If a contact has already made a payment then don't send him remaining emails of drip sequence Nudge for upgrade.
Triggers
Triggers are the “if this” part of an automation. Occurrence of a specific event may be considered a trigger. Some examples of triggers are:
Opened email
Clicked link of an email
Subscribed to a list
Made a purchase (tag got added)
and so on ...
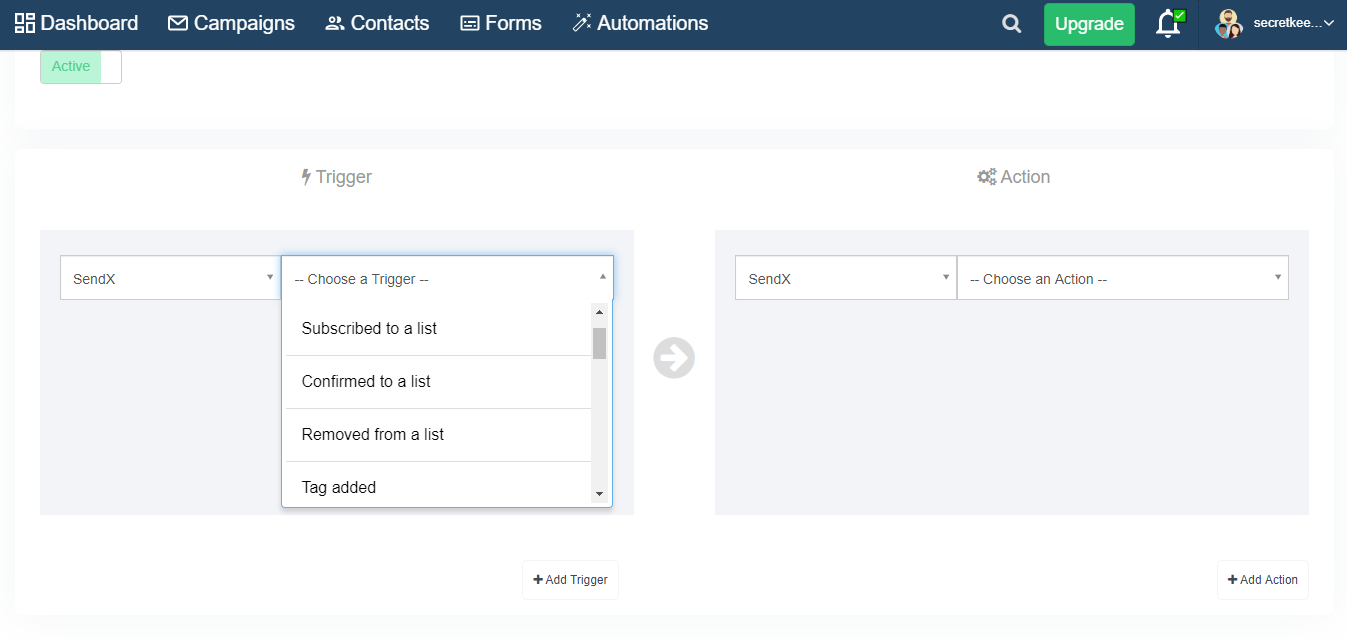
You can add more triggers as needed.
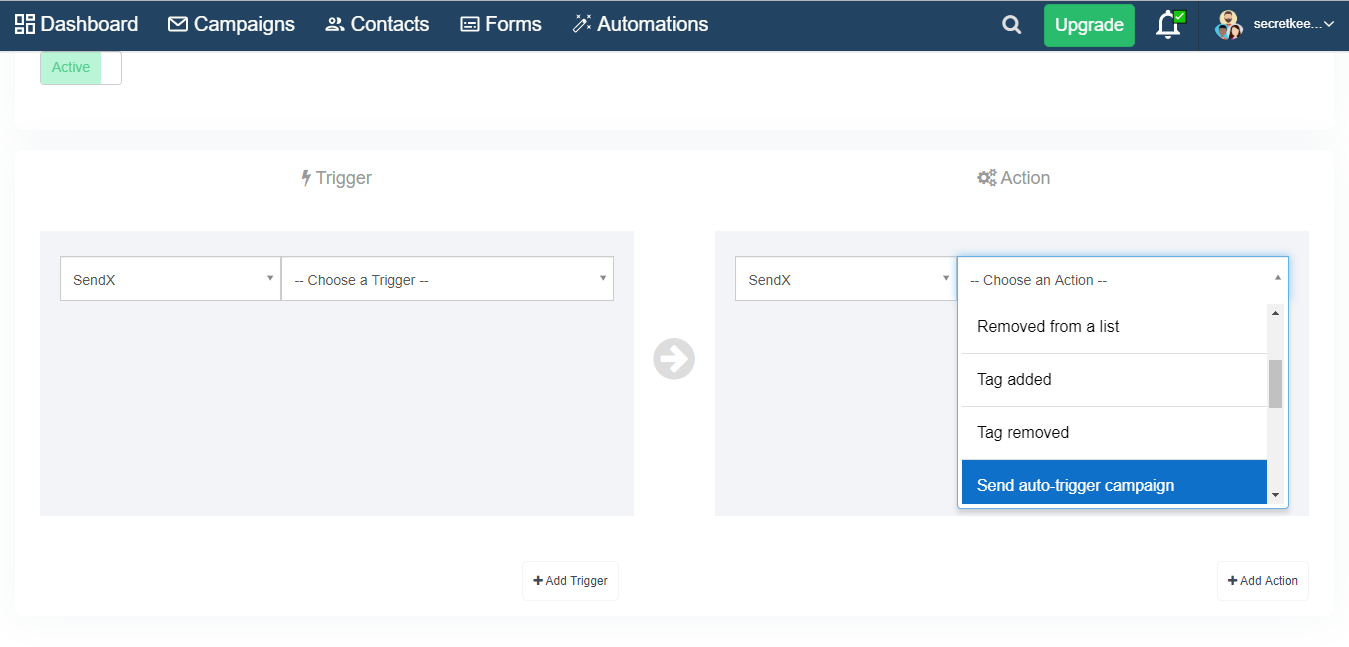
Actions
They are the then that part of automation. They are the activities that run after the trigger occurs. Some examples of actions are:
Send an email campaign with a limited discount offer
Start Onboarding drip sequence
Stop *Nudge for upgrade* drip sequence
Add or remove a tag associated with a contact
Update custom field associated with a contact
and so on...
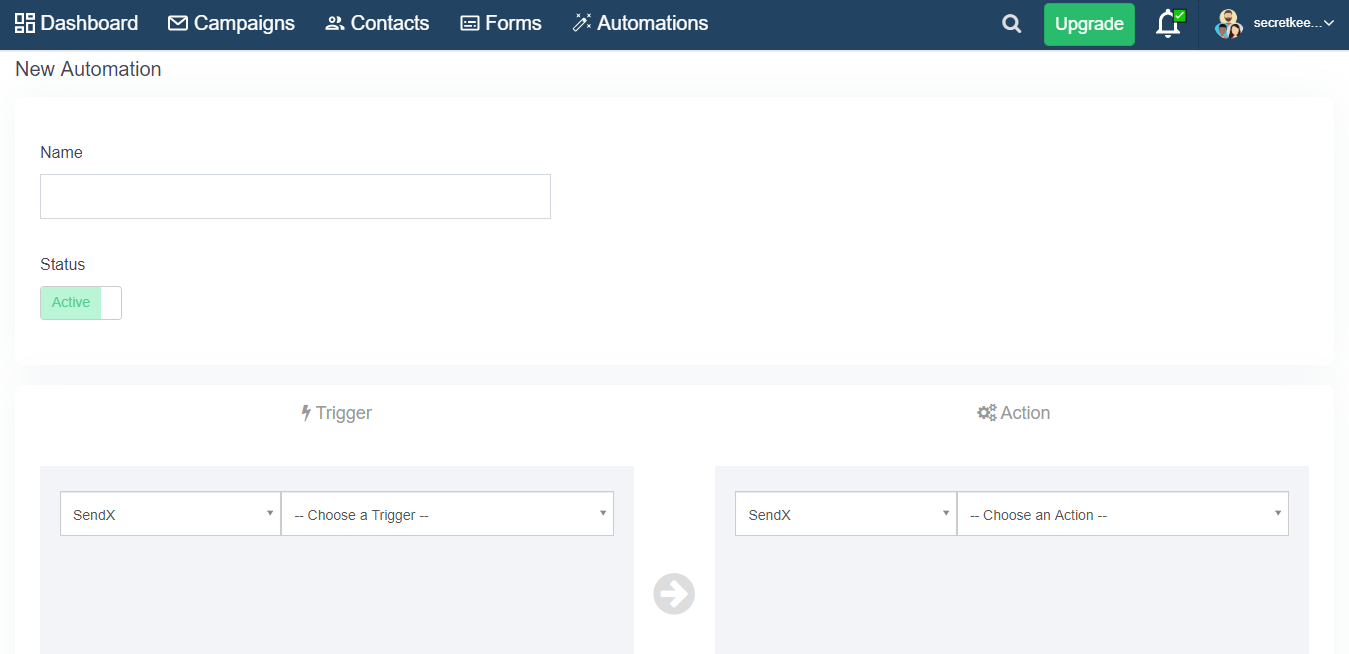
Setting up an Automation
Click on New Automation under the automation tab on the sidebar. Specify the automation name, select the automation trigger and one or multiple actions that you want to happen on occurrence of the trigger.
You can edit automation rules in the future to add or update triggers or actions.
Click Submit Automation to create the automation.